Plugin setup
This guide walks you through setting up the Storefront API plugin from zero to a working integration. You’ll configure security, generate a token, and validate your first request.
This guide is intended for both developers integrating Storefront API and administrators.
Overview
This guide uses the following four-step flow:
- Create and save the plugin
- View your credentials
- Configure security and options
- Start using the Storefront API
After that, you will be able to make requests to the Storefront API and validate the setup.
Step 1 — Create and save the plugin
Open your Stores management -> Stores settings, select "Storefront API" in the plugin list, then click "Save":
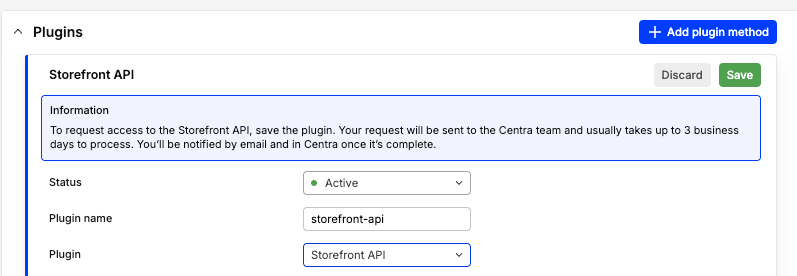
Do not fill any other fields yet.
Result of this step:
- Centra will be notified about your request to access Storefront API and will start processing it.
- You will be informed via email when the request has been processed.
Step 2 — View your credentials
Centra will be notified about your request to access Storefront API and will start processing it.
In the meantime, you can open the plugin settings again and observe some values:
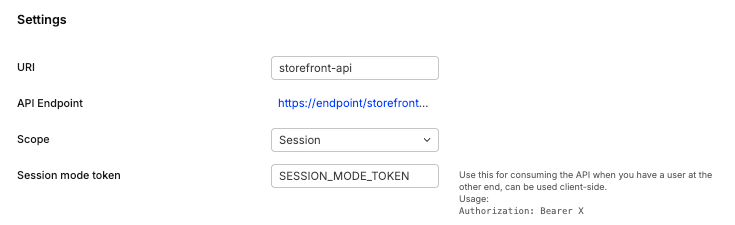
- URI: API URI, must be unique from other API URIs in the same Centra Store.
- API endpoint: The URL of your Storefront API GraphQL endpoint, ending with the configured URI.
- Scope: Session or No-session (see Authorization & sessions).
- Session mode token: Use this for consuming the API when you have a user at the other end. It's only used to generate new user sessions.
- No-session mode token: This token can be used to query data server side from the API to e.g. build a cache.
Keep in mind your access to the Storefront API is not yet activated; feel free to explore its plugin settings.
Step 3 — Configure security and options
Once you save and re-open the API plugin, you will find the auto-generated credentials, you can start setting up your API.
Increase security

- Shared secret: Add an authorization string for sensitive backend calls. Optional for Session mode, usually not needed for No-session mode.
- Allowed origins: Restrict access to your Storefront API. Add one line per origin.
Filter fields
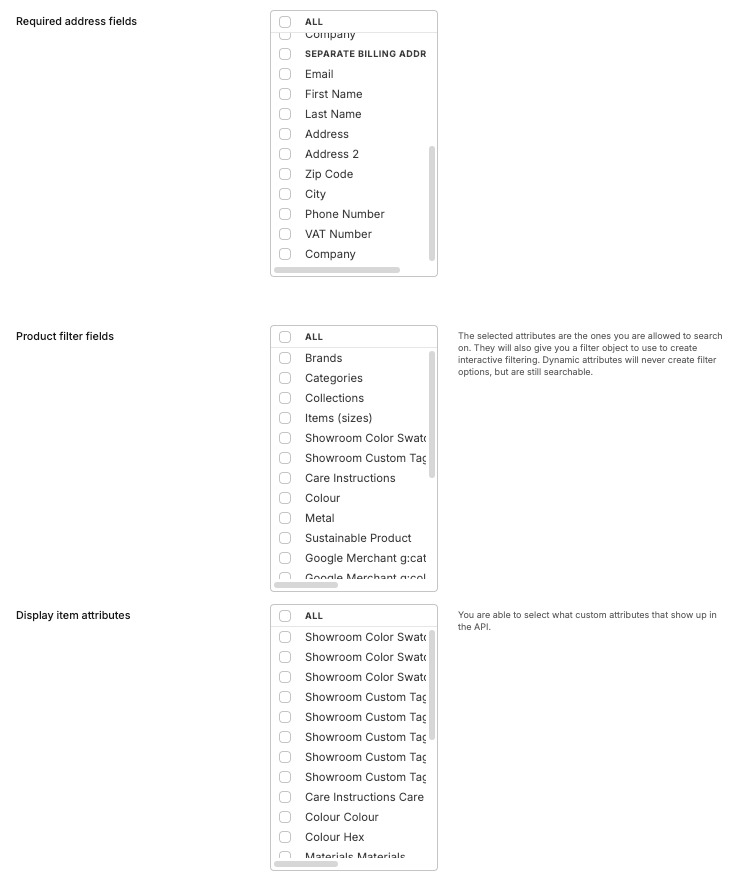
- Required address fields Checkout and payment will be blocked if these fields (e.g., name, address, email, T&C consent) are not provided.
- Product filter fields Controls which custom attributes are returned and usable for filtering in the API.
- Display item / order attributes Controls which custom attributes are returned in the API.
Enable captcha

- Captcha protected calls Enables Google reCAPTCHA for this API instance (requires separate Captcha plugin to be activated). Please make sure your frontend supports the captcha validation before enabling this setting in the API plugin.
You will be able to save the plugin, but you still cannot use the API until the installation is complete.
Step 4 — Start using the Storefront API
When Storefront API access is enabled:
- The user who requested it will receive a confirmation email.
- The Storefront API plugin will stop displaying the info message
Your Storefront API access request is being processed by the Centra team.
You now have access to Storefront API!
Test it
- Using Postman or Bruno:
| Type | Field | Value |
|---|---|---|
| Resource | URL | {{API Endpoint}} |
| Parameter | Query | {"query":"query displayItem { displayItems { list { id } } }"} |
| Header | Authorization | Bearer {{No-session mode token}} |
| Header | X-Shared-Secret | {{Shared secret}} |
- Using curl:
curl -sS -X POST "{{API Endpoint}}" \
  -H "Content-Type: application/json" \
  -H "Authorization: Bearer {{No-session mode token}}" \
  -H "X-Shared-Secret: {{Shared secret}}" \
  -d '{"query":"query displayItem { displayItems { list { id } } }"}'